
Operating a self-managed MLflow tracking server comes with administrative overhead, including server maintenance and resource scaling. As teams scale their ML experimentation, efficiently managing resources during peak usage and idle periods is a challenge. Organizations running MLflow on Amazon EC2 or on-premises can optimize costs and engineering resources by using Amazon SageMaker AI with serverless MLflow.
This post shows you how to migrate your self-managed MLflow tracking server to a MLflow App – a serverless tracking server on SageMaker AI that automatically scales resources based on demand while removing server patching and storage management tasks at no cost. Learn how to use the MLflow Export Import tool to transfer your experiments, runs, models, and other MLflow resources, including instructions to validate your migration’s success.
While this post focuses on migrating from self-managed MLflow tracking servers to SageMaker with MLflow, the MLflow Export Import tool offers broader utility. You can apply the same approach to migrate existing SageMaker managed MLflow tracking servers to the new serverless MLflow capability on SageMaker. The tool also helps with version upgrades and establishing backup routines for disaster recovery.
Step-by-step guide: Tracking server migration to SageMaker with MLflow
The following guide provides step-by-step instructions for migrating an existing MLflow tracking server to SageMaker with MLflow. The migration process consists of three main phases: exporting your MLflow artifacts to intermediate storage, configuring an MLflow App, and importing your artifacts. You can choose to execute the migration process from an EC2 instance, your personal computer, or a SageMaker notebook. Whichever environment you select must maintain connectivity to both your source tracking server and your target tracking server. MLflow Export Import supports exports from both self-managed tracking servers and Amazon SageMaker MLflow tracking servers (from MLflow v2.16 onwards) to Amazon SageMaker Serverless MLflow.
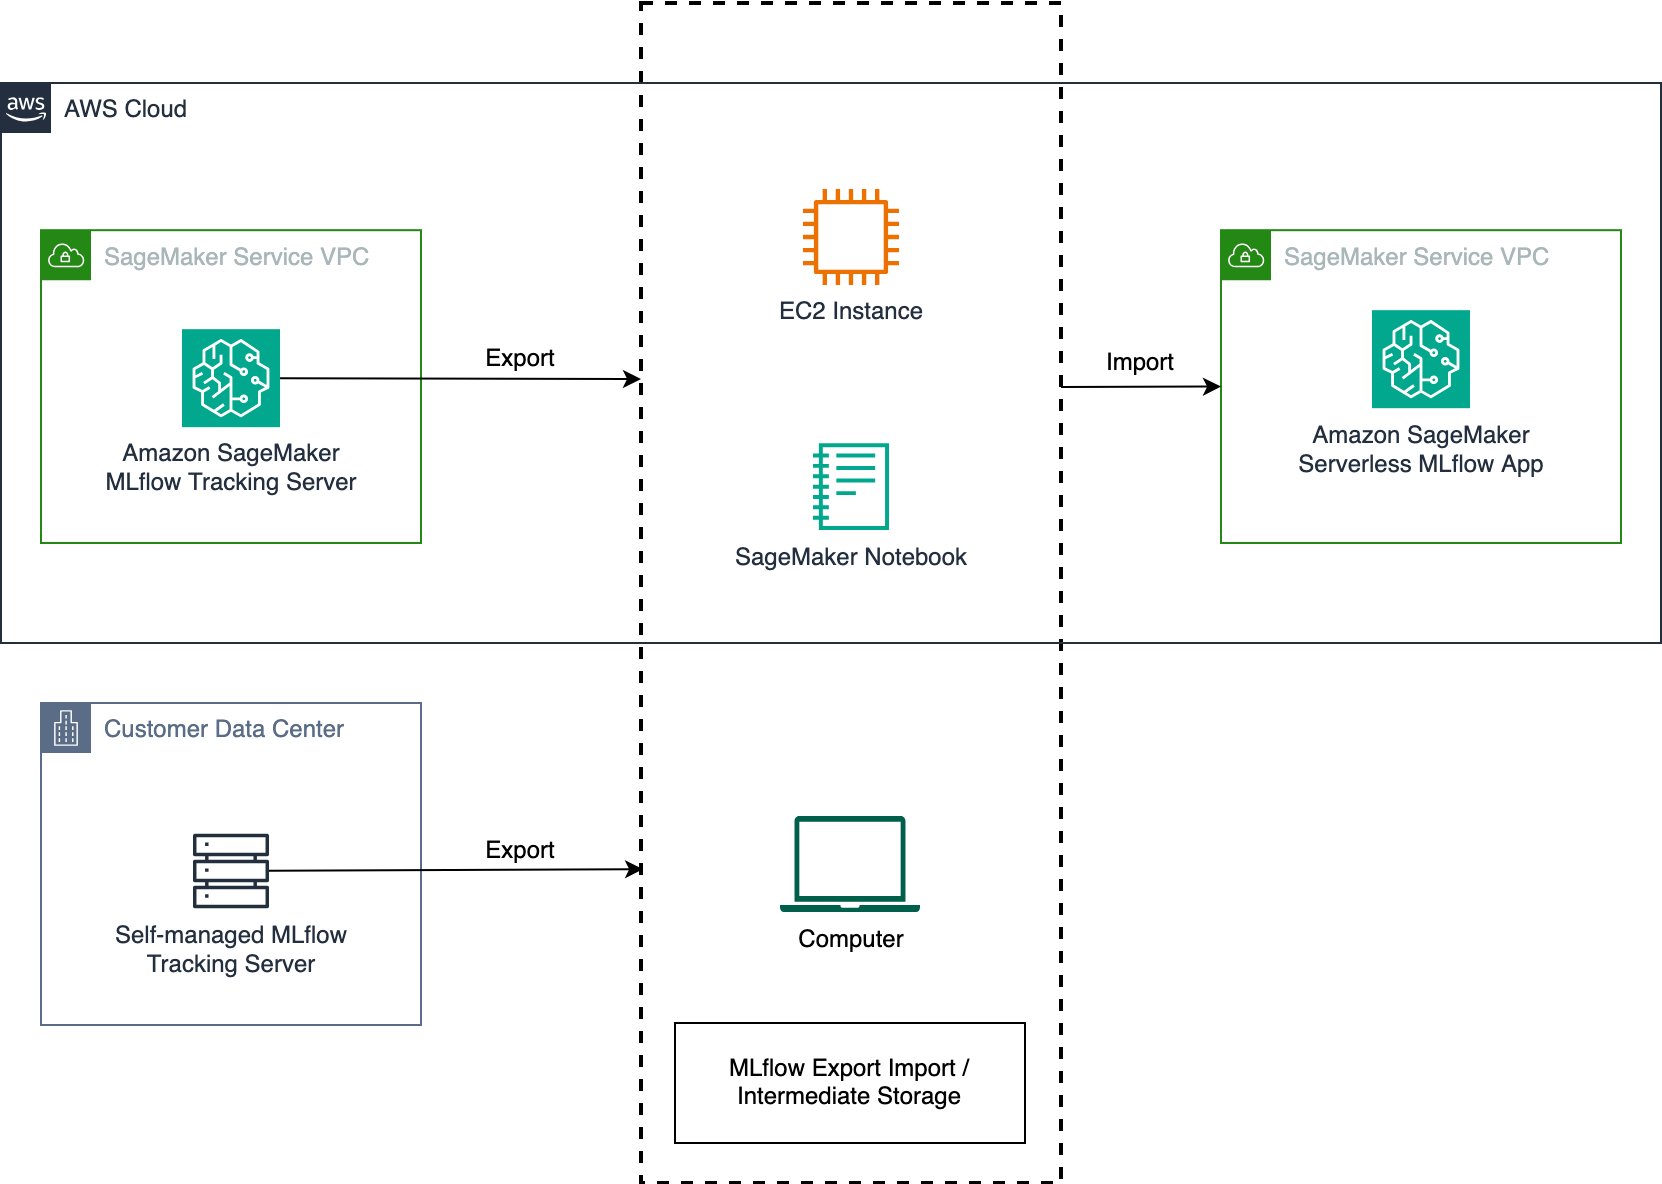
Figure 1: Migration process with MLflow Export Import tool
Prerequisites
To follow along with this post, make sure you have the following prerequisites:
- An AWS account—if you don’t have one, sign up as a new customer.
- Connectivity to both source and target tracking servers (see documentation for self-managed MLflow and MLflow on Amazon SageMaker AI)
- AWS Identity and Access Management (IAM) permissions to create a SageMaker MLflow App (see Set up IAM permissions for MLflow)
- An execution environment (EC2, local machine, or SageMaker notebook) with Python 3.10+ installed and adequate storage and compute resources for your tracking server’s data size
- Execution environment configured with IAM permissions for Serverless MLflow (see SageMaker MLflow IAM requirements)
Step 1: Verify MLflow version compatibility
Before starting the migration, remember that not all MLflow features may be supported in the migration process. The MLflow Export Import tool supports different objects based on your MLflow version. To prepare for a successful migration:
- Verify the current MLflow version of your existing MLflow tracking server:
- Review the latest supported MLflow version in the Amazon SageMaker MLflow documentation. If you’re running an older MLflow version in a self-managed environment, we recommend upgrading to the latest version supported by Amazon SageMaker MLflow before proceeding with the migration:
- For an up-to-date list of MLflow resources that can be transferred using MLflow Export Import, please refer to the MLflow Export Import documentation.
Step 2: Create a new MLflow App
To prepare your target environment, you first need to create a new SageMaker Serverless MLflow App.
- After you’ve setup SageMaker AI (see also Guide to getting set up with Amazon SageMaker AI), you can access Amazon SageMaker Studio and in the MLflow section, create a new MLflow App (if it wasn’t automatically created during the initial domain setup). Follow the instructions outlined in the SageMaker documentation.
- Once your managed MLflow App has been created, it should appear in your SageMaker Studio console. Keep in mind that the creation process can take up to 5 minutes.
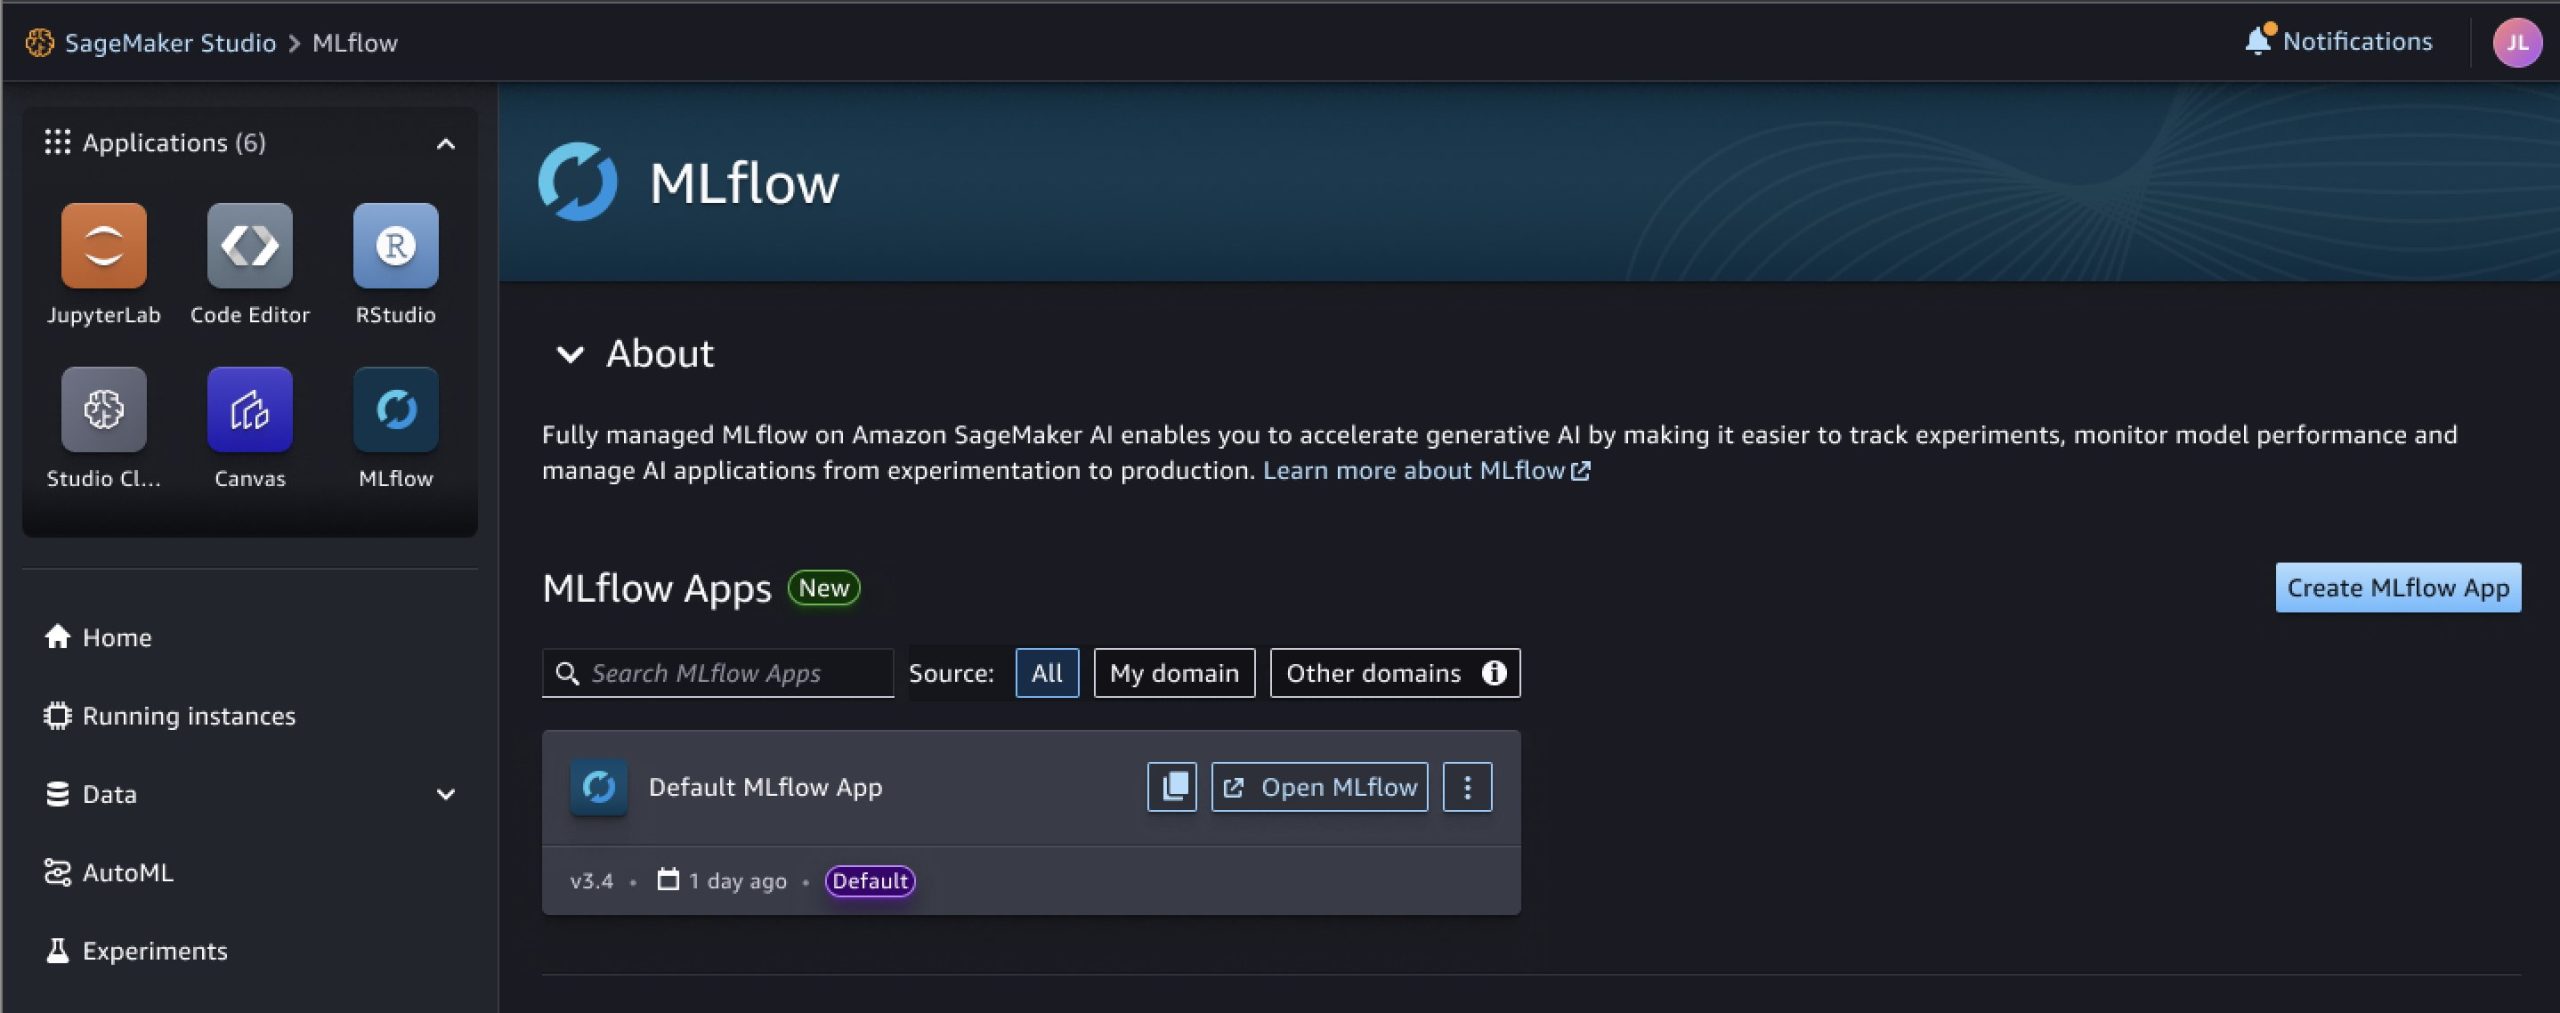
Figure 2: MLflow App in SageMaker Studio Console
Alternatively, you can view it by executing the following AWS Command Line Interface (CLI) command:
- Copy the Amazon Resource Name (ARN) of your tracking server to a document, it’s needed in Step 4.
- Choose Open MLflow, which leads you to an empty MLflow dashboard. In the next steps, we import our experiments and related artifacts from our self-managed MLflow tracking server here.
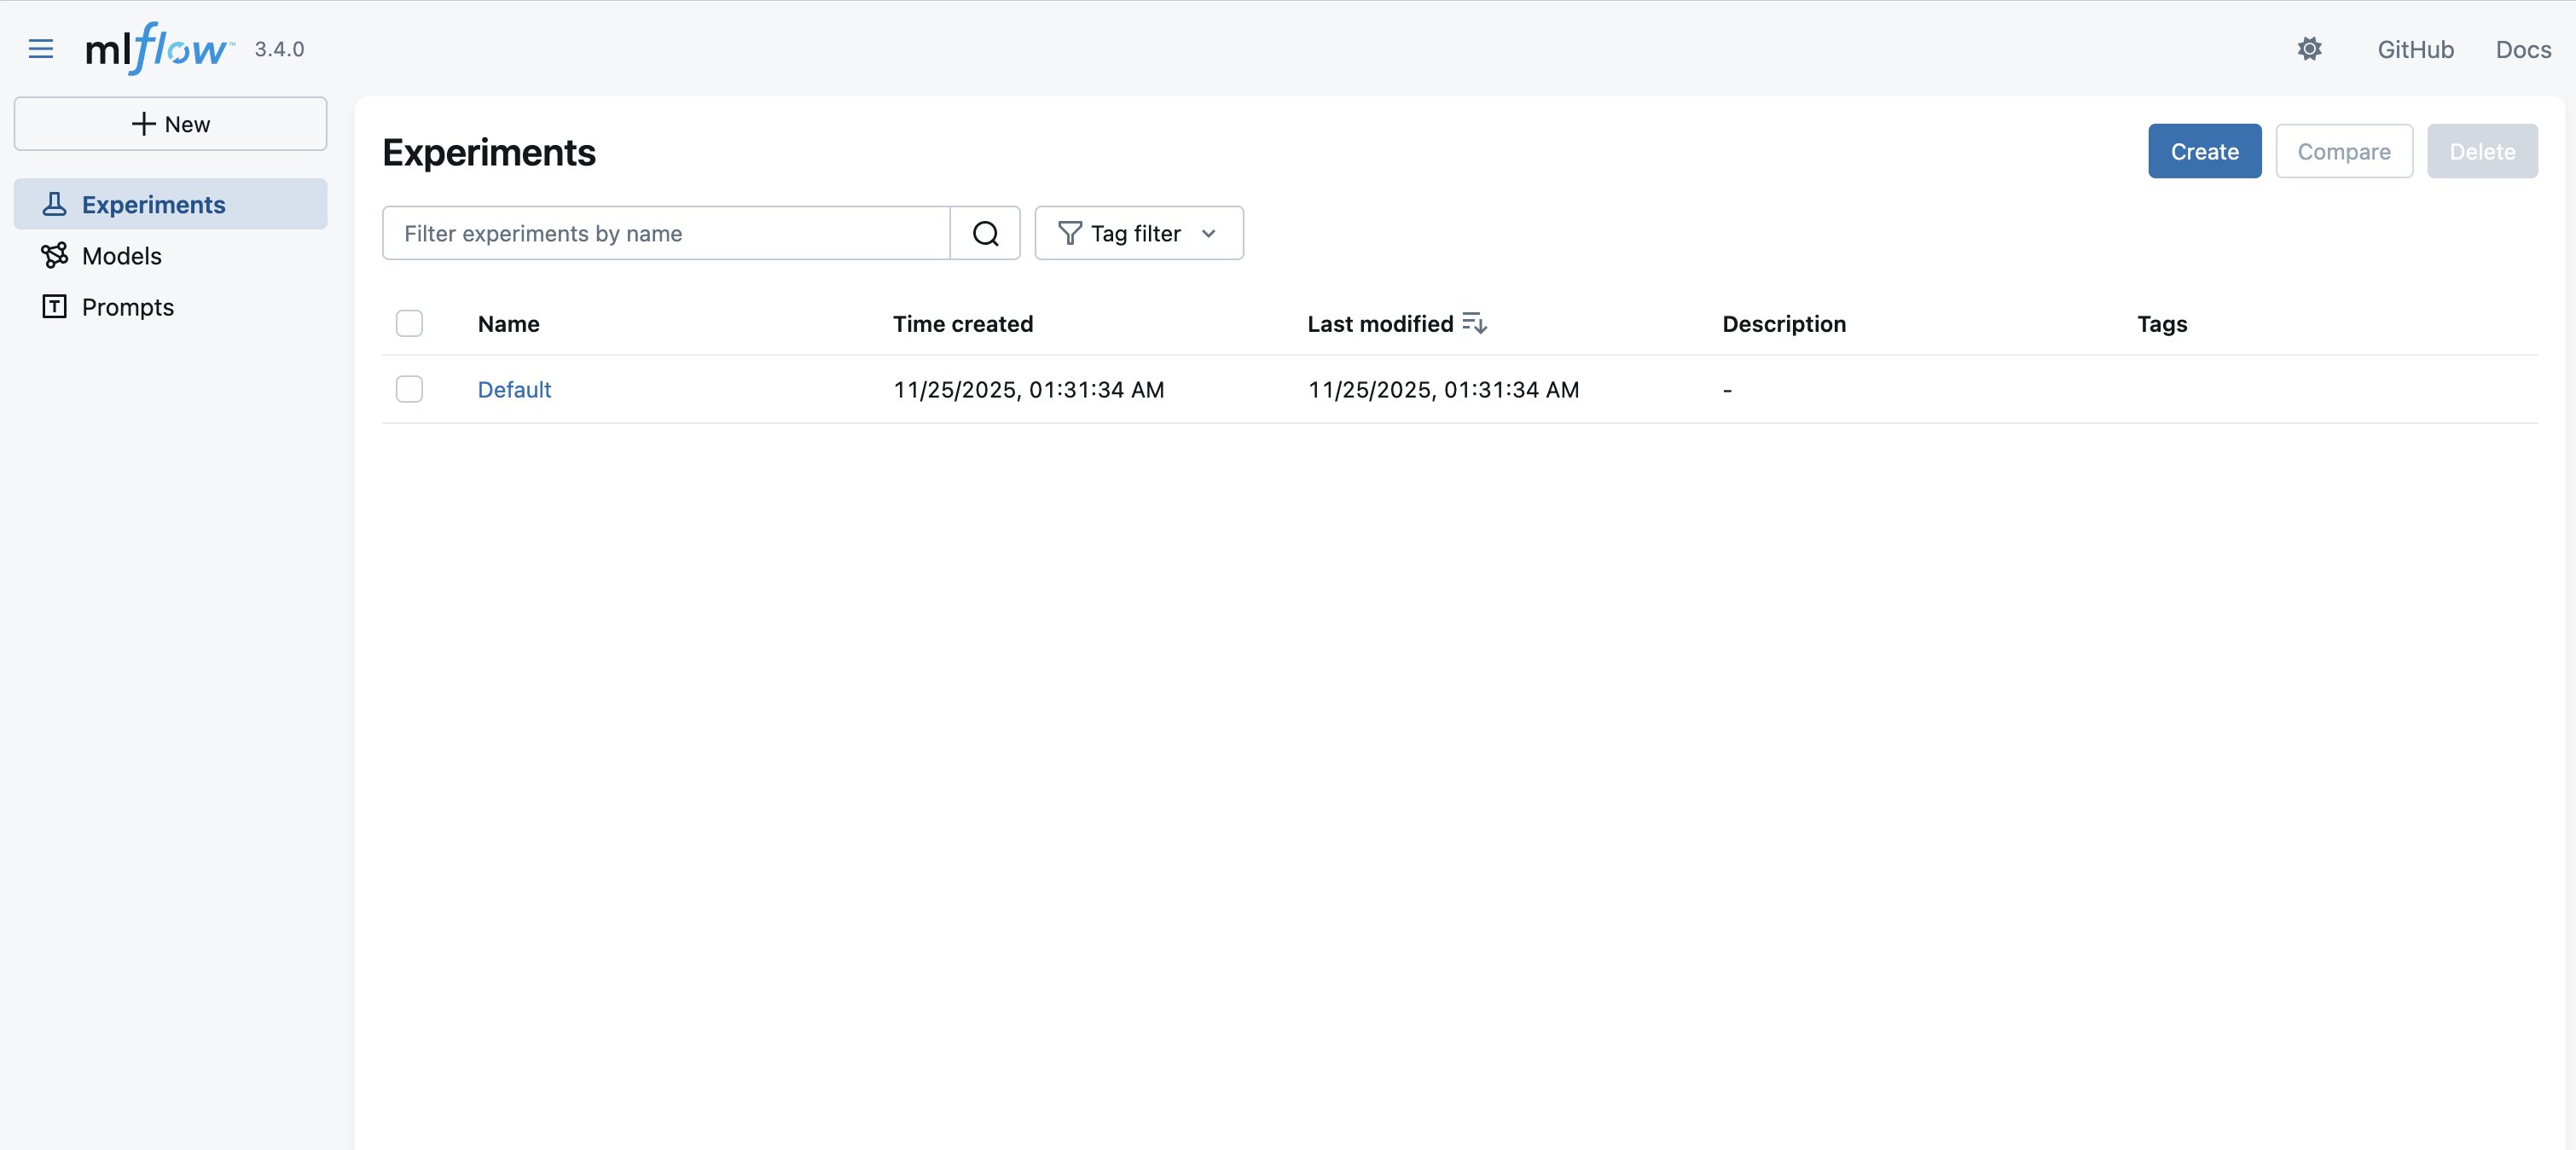
Figure 3: MLflow user interface, landing page
Step 3: Install MLflow and the SageMaker MLflow plugin
To prepare your execution environment for the migration, you need to establish connectivity to your existing MLflow servers (see prerequisites) and install and configure the necessary MLflow packages and plugins.
- Before you can start with the migration, you need to establish connectivity and authenticate to the environment hosting your existing self-managed MLflow tracking server (e.g., a virtual machine).
- Once you have access to your tracking server, you need to install MLflow and the SageMaker MLflow plugin in your execution environment. The plugin handles the connection establishment and authentication to your MLflow App. Execute the following command (see also the documentation):
Step 4: Install the MLflow Export Import tool
Before you can export your MLflow resources, you need to install the MLflow Export Import tool.
- Familiarize yourself with the MLflow Export Import tool and its capabilities by visiting its GitHub page. In the following steps, we make use of its bulk tools (namely
export-allandimport-all), which allow you to create a copy of your tracking server with its experiments and related artefacts. This approach maintains the referential integrity between objects. If you want to migrate only selected experiments or change the name of existing experiments, you can use Single tools. Please review the MLflow Export Import documentation for more information on supported objects and limitations. - Install the MLflow Export Import tool in your environment, by executing the following command:
Step 5: Export MLflow resources to a directory
Now that your environment is configured, we can begin the actual migration process by exporting your MLflow resources from your source environment.
- After you’ve installed the MLflow Export Import tool, you can create a target directory in your execution environment as a destination target for the resources, which you extract in the next step.
- Inspect your existing experiments and the associated MLflow resources you want to export. In the following example, we want to export the currently stored objects (for example, experiments and registered models).
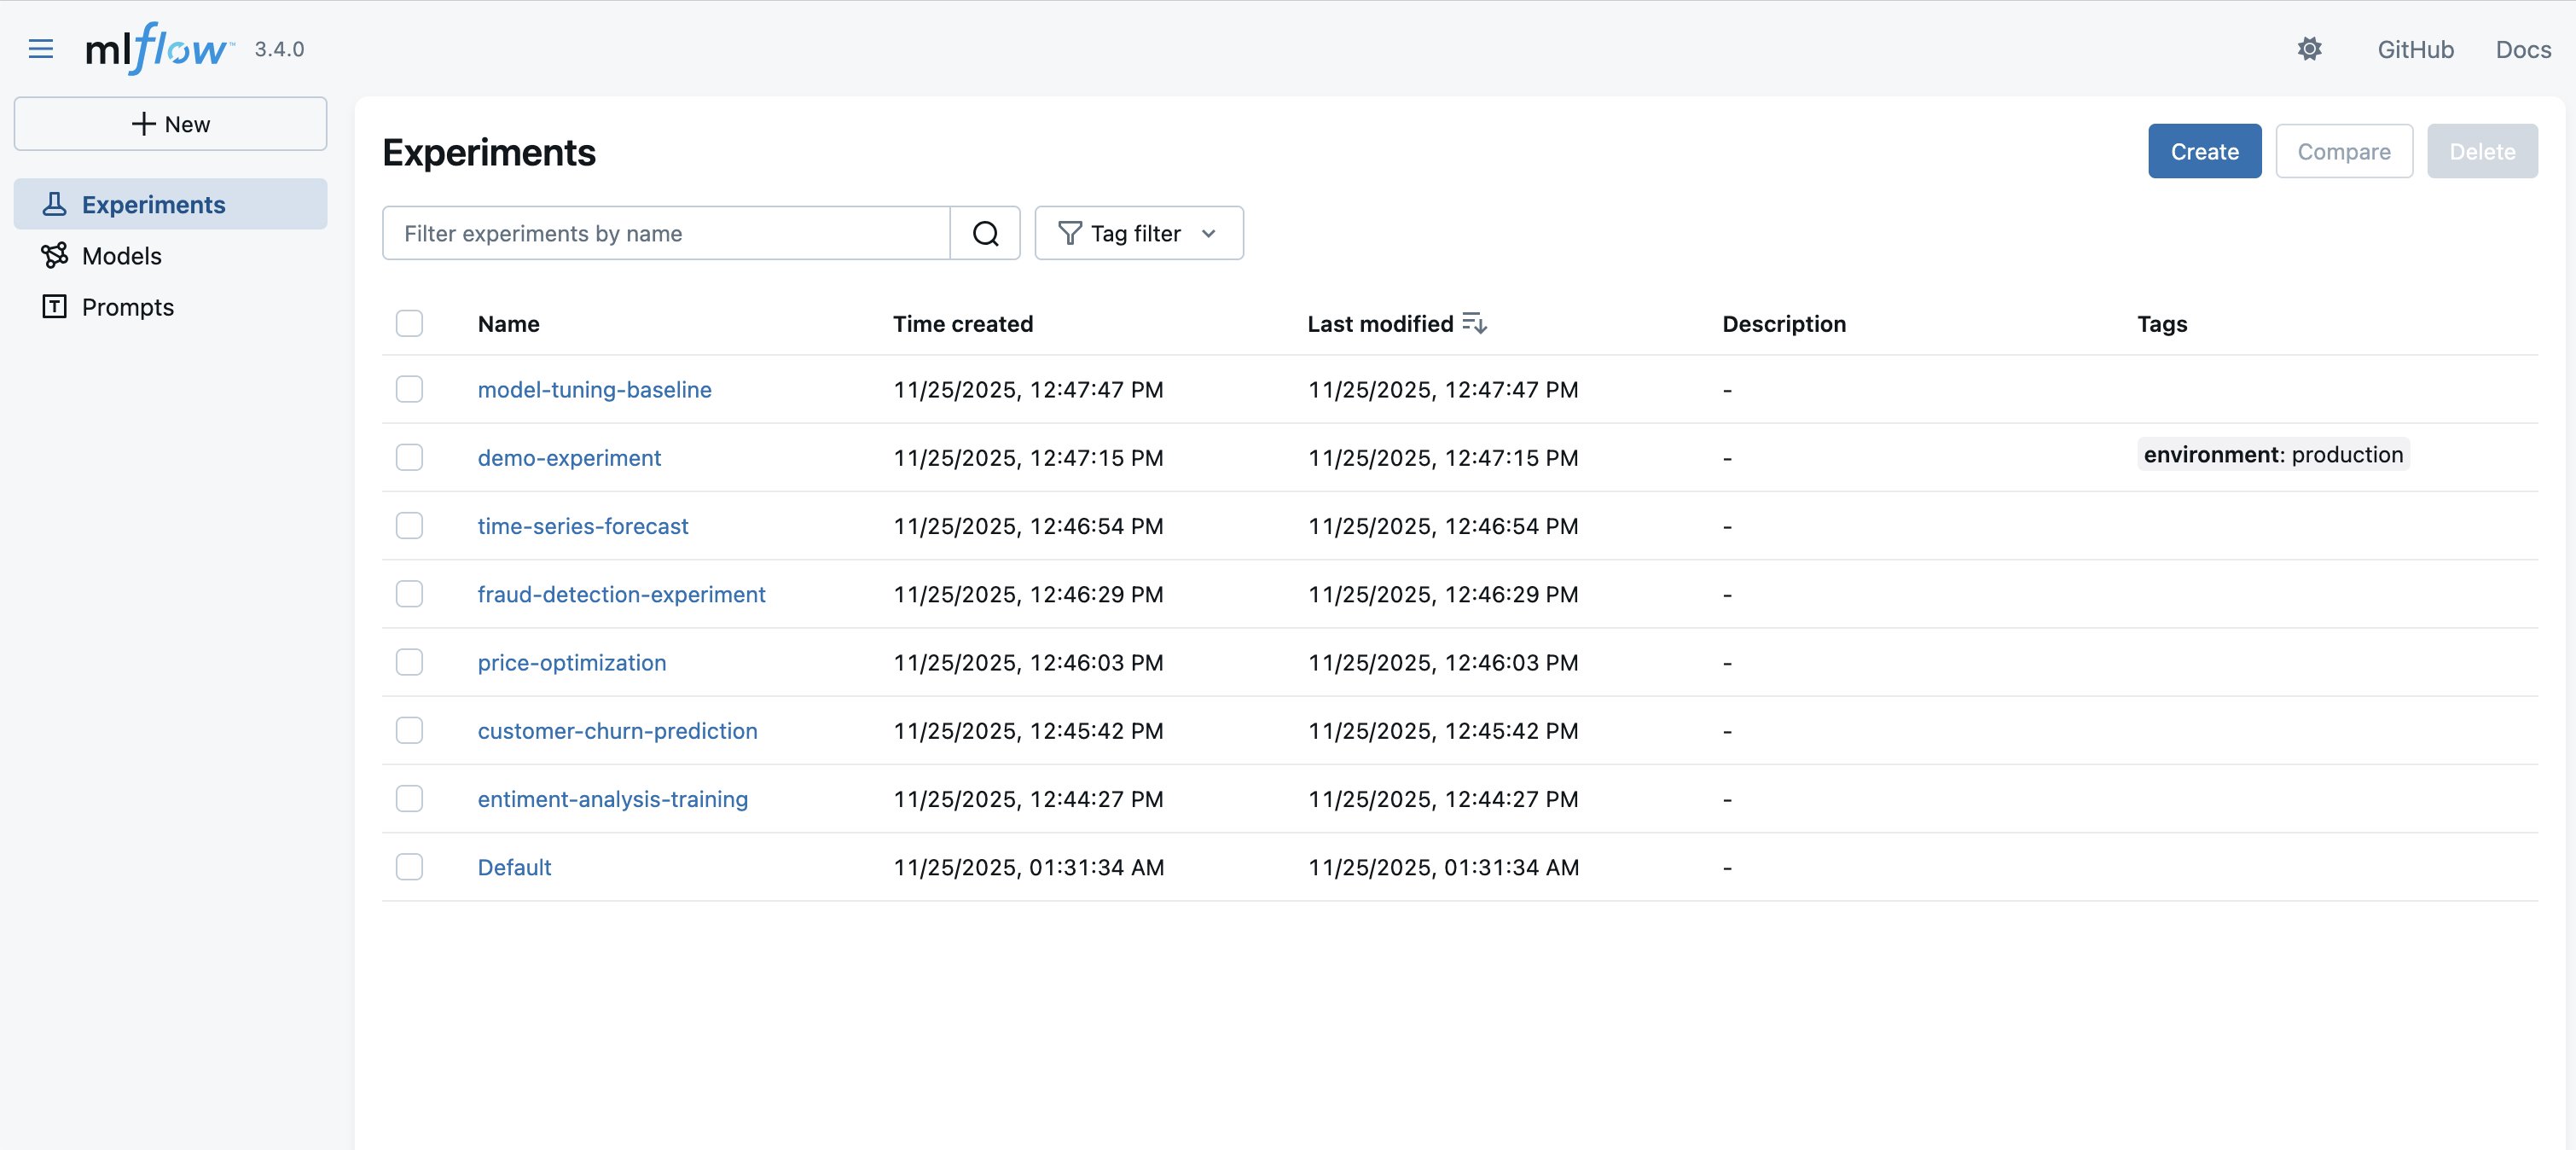
Figure 4: Experiments stored in MLflow
- Start the migration by configuring the Uniform Resource Identifier (URI) of your tracking server as an environmental variable and executing the following bulk export tool with the parameters of your existing MLflow tracking server and a target directory (see also the documentation):
- Wait until the export has finished to inspect the output directory (in the preceding case:
mlflow-export).
Step 6: Import MLflow resources to your MLflow App
During import, user-defined attributes are retained, but system-generated tags (e.g., creation_date) are not preserved by MLflow Export Import. To preserve original system attributes, use the --import-source-tags option as shown in the following example. This saves them as tags with the mlflow_exim prefix. For more information, see MLflow Export Import – Governance and Lineage. Be aware of additional limitations detailed here: Import Limitations.
The following procedure transfers your exported MLflow resources into your new MLflow App:Start the import by configuring the URI for your MLflow App. You can use the ARN–which you saved in Step 1–for this. The previously installed SageMaker MLflow plugin automatically translates the ARN in a valid URI and creates an authenticated request to AWS (remember to configure your AWS credentials as environmental variables so the plugin can pick them up).
Step 7: Validate your migration results
To confirm your migration was successful, verify that your MLflow resources were transferred correctly:
- Once the import-all script has migrated your experiments, runs, and other objects to the new tracking server, you can start verifying the success of the migration, by opening the dashboard of your serverless MLflow App (which you opened in Step 2) and verify that:
- Exported MLflow resources are present with their original names and metadata
- Run histories are complete with the metrics and parameters
- Model artifacts are accessible and downloadable
- Tags and notes are preserved
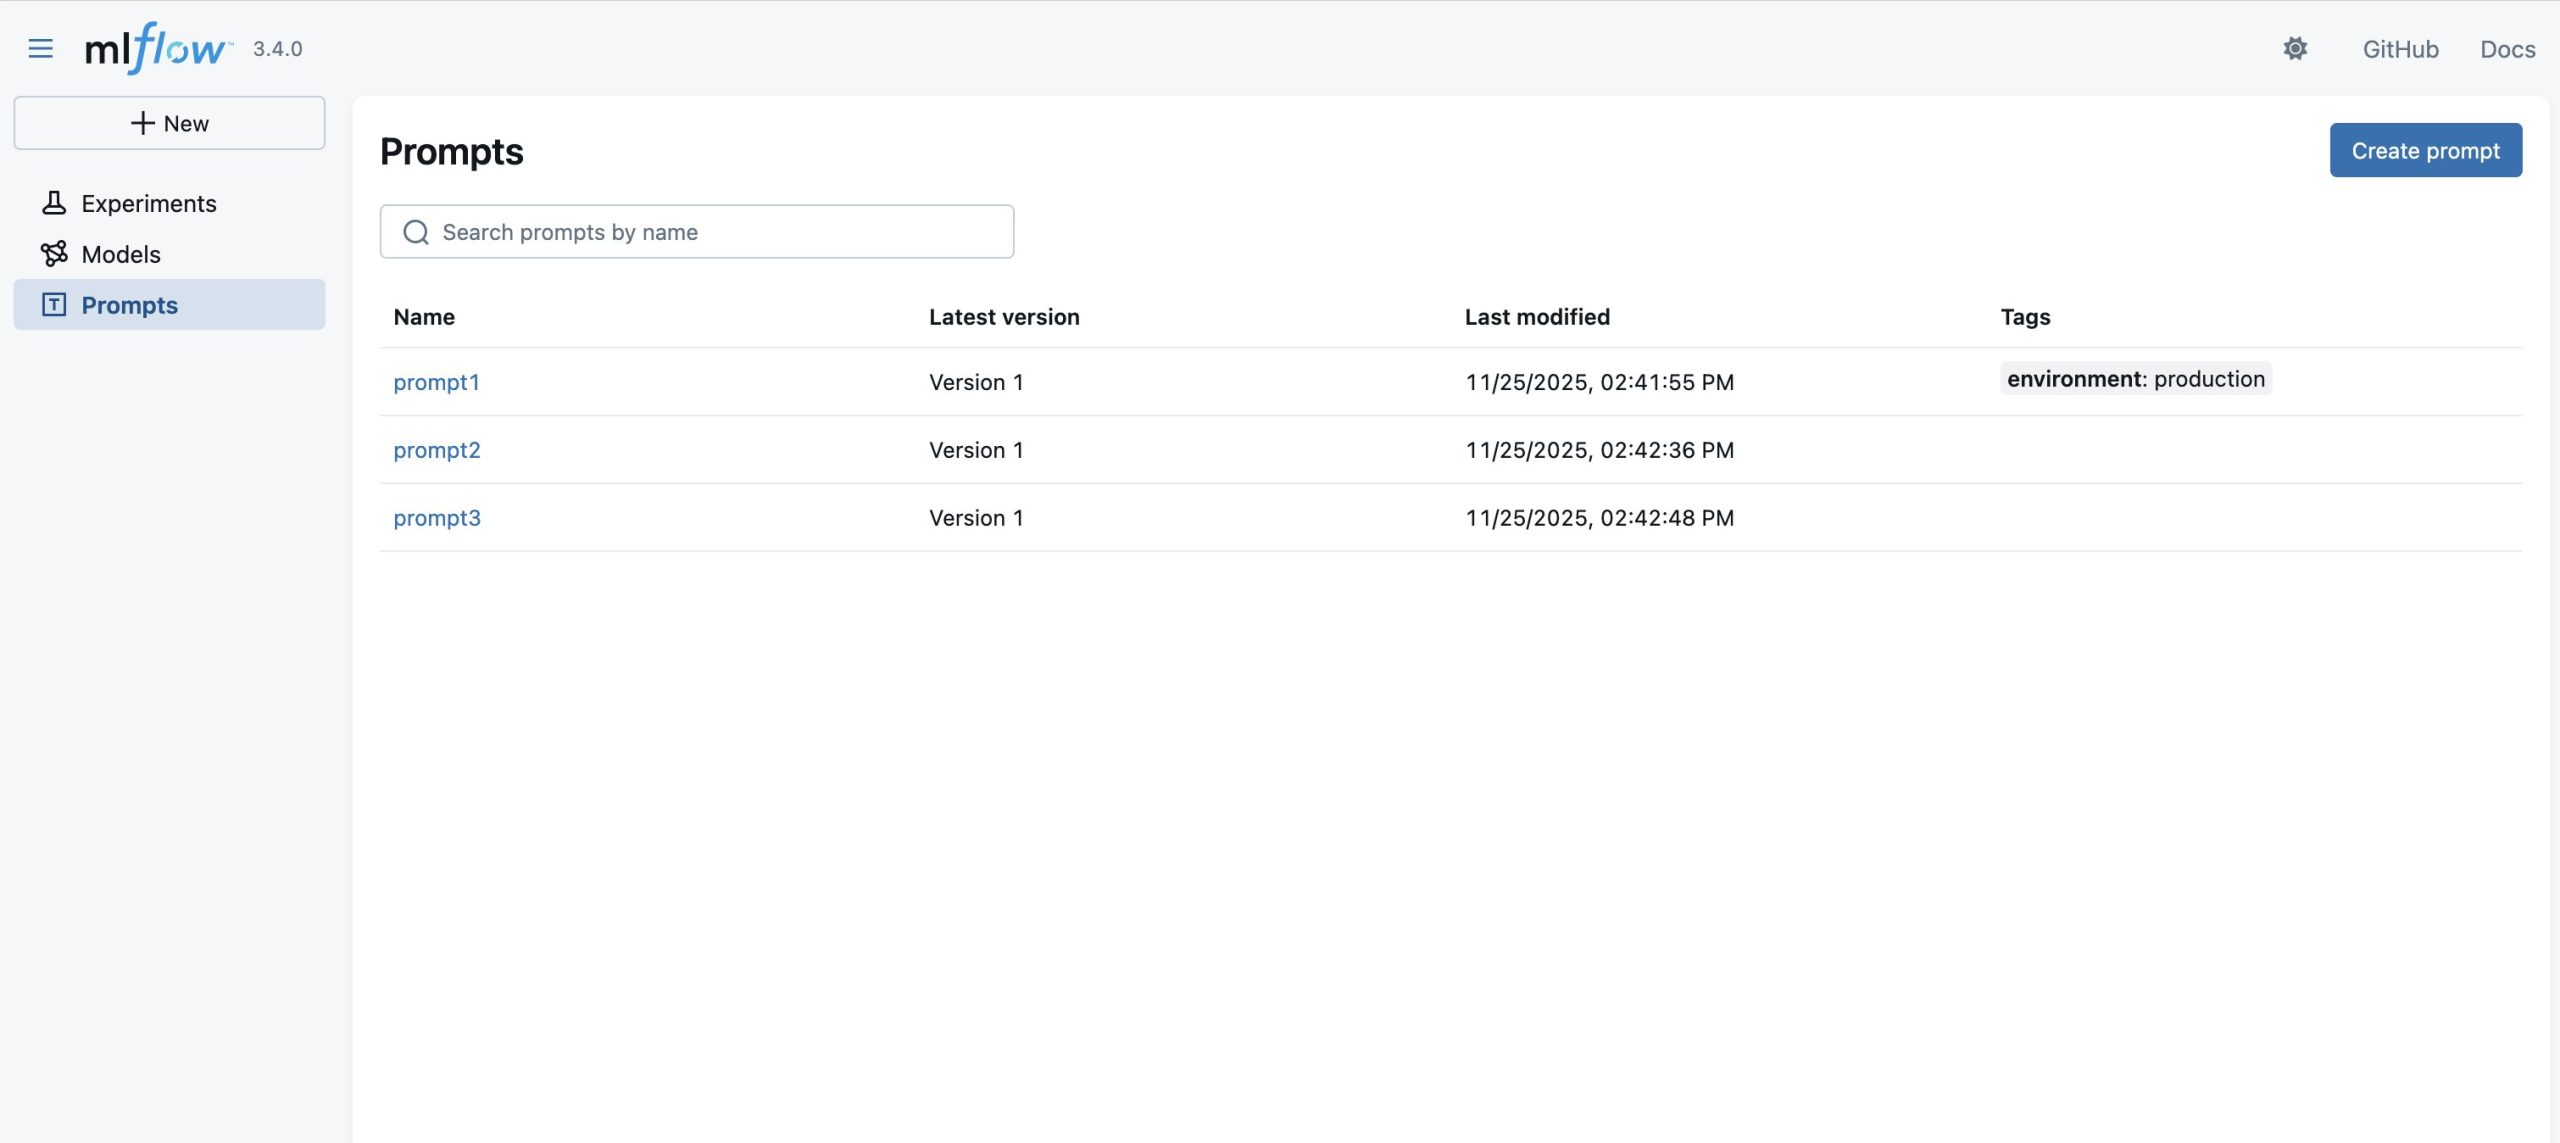
Figure 5: MLflow user interface, landing page after migration
- You can verify programmatic access by starting a new SageMaker notebook and running the following code:
Considerations
When planning your MLflow migration, verify your execution environment (whether EC2, local machine, or SageMaker notebooks) has sufficient storage and computing resources to handle your source tracking server’s data volume. While the migration can run in various environments, performance may vary based on network connectivity and available resources. For large-scale migrations, consider breaking down the process into smaller batches (for example, individual experiments).
Cleanup
A SageMaker managed MLflow tracking server will incur costs until you delete or stop it. Billing for tracking servers is based on the duration the servers have been running, the size selected, and the amount of data logged to the tracking servers. You can stop tracking servers when they’re not in use to save costs, or you can delete them using API or the SageMaker Studio UI. For more details on pricing, refer to Amazon SageMaker pricing.
Conclusion
In this post, we demonstrated how to migrate a self-managed MLflow tracking server to SageMaker with MLflow using the open source MLflow Export Import tool. The migration to a serverless MLflow App on Amazon SageMaker AI reduces the operational overhead associated with maintaining MLflow infrastructure while providing seamless integration with the comprehensive AI/ML serves in SageMaker AI.
To get started with your own migration, follow the preceding step-by-step guide and consult the referenced documentation for additional details. You can find code samples and examples in our AWS Samples GitHub repository. For more information about Amazon SageMaker AI capabilities and other MLOps features, visit the Amazon SageMaker AI documentation.
About the authors
 Rahul Easwar is a Senior Product Manager at AWS, leading managed MLflow and Partner AI Apps within the SageMaker AIOps team. With over 20 years of experience spanning startups to enterprise technology, he leverages his entrepreneurial background and MBA from Chicago Booth to build scalable ML platforms that simplify AI adoption for organizations worldwide. Connect with Rahul on LinkedIn to learn more about his work in ML platforms and enterprise AI solutions.
 Roland Odorfer is a Solutions Architect at AWS, based in Berlin, Germany. He works with German industry and manufacturing customers, helping them architect secure and scalable solutions. Roland is interested in distributed systems and security. He enjoys helping customers use the cloud to solve complex challenges.
 Anurag Gajam is a Software Development Engineer with the Amazon SageMaker MLflow team at AWS. His technical interests span AI/ML infrastructure and distributed systems, where he is a recognized MLflow contributor who enhanced the mlflow-export-import tool by adding support for additional MLflow objects to enable seamless migration between SageMaker MLflow services. He specializes in solving complex problems and building reliable software that powers AI workloads at scale. In his free time, he enjoys playing badminton and going for hikes.